Towards the end of summer, blackberries start to grow along the roads and trails of Northern California. I always get out there at least once a summer to pick my own bounty of Blackberries. This summer, I made them into the perfect Pop-Tart filling. With maple syrup and lemon juice, the tartness of the blackberries is balanced perfectly. And then I paired it with a salty and sweet peanut butter filling!!! These vegan Pop-Tarts are a game changer. Perfect to make on a summer afternoon; we freeze the tarts before baking, so it doesn't matter what the temperature is in your kitchen; they'll come out wonderfully flaky and deliciously filled.
Blackberries: You may use fresh or frozen berries; just keep in mind the cooking time may differ for the jam. I love blackberries for the summertime because they are fresh and local, but you can use whatever berry you'd like. Note that flavor, sweetness, and tartness may differ, but use your favorite berries!
Lemon Juice: I always add lemon juice and zest to jam to help balance the sweetness and bring out the flavor in the berries.
Peanut butter: Use a natural peanut butter if you can, as we are adding sugar, oil, and salt to the peanut butter. But you may also use whatever your favorite nut butter is!
Miso Paste: The saltiness from the miso helps to balance out the sweetness and brings out the flavor in the peanut butter. Depending on how salty you'd like it, or if your peanut butter is salty, you can add more or less miso paste. You may also replace it with sea salt if you don't have miso.
Food Dye: I used natural food coloring in the icing for the top of the Pop-Tarts. Use whatever dye you'd like, in whatever color you'd like. I like to use a color similar to the berries on the inside. The icing is not a large amount, so it shouldn't need too much food dye.
Vegan Brown Sugar Miso PB & J Pop Tarts
Ingredients
Equipment
Method
- Combine all dry ingredients in a food processor. Cube the butter and add it quickly. Pulse until sandy and the butter pieces aren't any larger than a pea. Stop the food processor at least every 20 seconds to check the texture; this happens quickly.Alternatively, in a bowl, combine all the dry ingredients and whisk to combine. Add in the cubed butter and, with your hands, break up the butter into small pieces, no larger than a pea. The mixture will be crumbly and sandy.
- Add in cold water, a tablespoon at a time. Continue to mix or pulse the dough until it is just combined. If using a food processor, the dough should start to form into a uniform ball.
- Wrap the dough and chill for at least 1 hour.
- While the dough cools, make the jam. Blend the berries in a blender until no chunks remain. Strain the juice into a small saucepan or pot with a lid. Add the vanilla, salt, lemon zest and juice, and sweetener of choice. Bring to medium heat.
- Once the jam is boiling, lower the heat to medium-low, allowing the jam to reduce by about 75%, or until a spoon dragged across the bottom of the pot leaves a trail. Make sure to scrape off the foam that may form on top of your jam as it boils and discard it. That is the moisture that you want to leave in the jam. You want the jam to have thickened.
- Transfer the jam to a jar and leave it to cool in the fridge.
- Make the Peanut Butter filling. Combine all the ingredients in a bowl and stir. It should be thick and pliable in your hands.
- Cut out your stencils. On a piece of paper, measure and draw a rectangle of the size of a Pop-Tart you'd like. I made mine 3''x 2.5''. Cut out the rectangle. Then, measure and draw another rectangle about 1/4'' smaller on all sides. This will be the stencil for your filling. Mine was 2.75''x 2.25''.
- Roll out half your dough. Flour a piece of parchment paper or a silicone mat. Roll out the dough until thin, about 1 cm thick. Cut out as many rectangles as you can using the large (3''x 2.5'') paper stencil. Peel away the excess and place the tray in the fridge. If using my measurements, you should be able to get about 30 rectangles or 15 total Pop-Tarts. You will need at least 2, if not 3, pieces of parchment or silicone, as you'll want to keep rolling out more pastry as the others cool in the freezer. Cut out as many rectangles as you can in one roll, place them in the freezer, roll and cut another batch, then peel off the frozen pastry from the freezer and transfer it to the silicone mat with the newly cut rectangles. I would then place all of those in the freezer. The dough gets warm and unworkable very quickly, so you'll have to keep transferring the cut-out rectangles in and out of the freezer.
- Optionally, you can make a stencil for the filling. Lightly score the outline of the stencil on half of your rectangles. You don't want it to cut all the way through the dough, just lightly score to make a guide for the peanut butter and jam filling later.
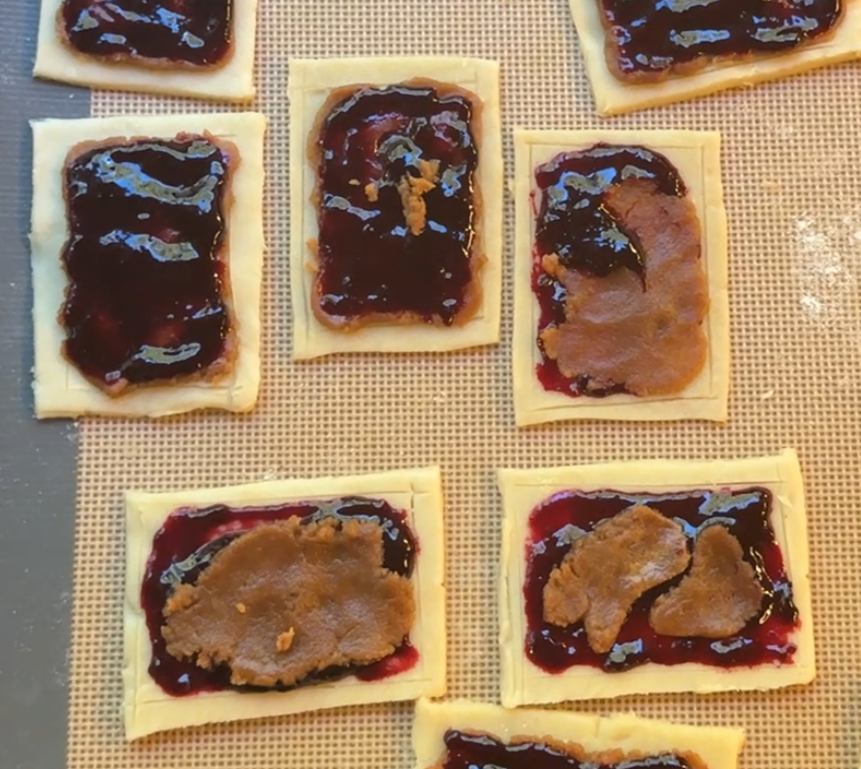
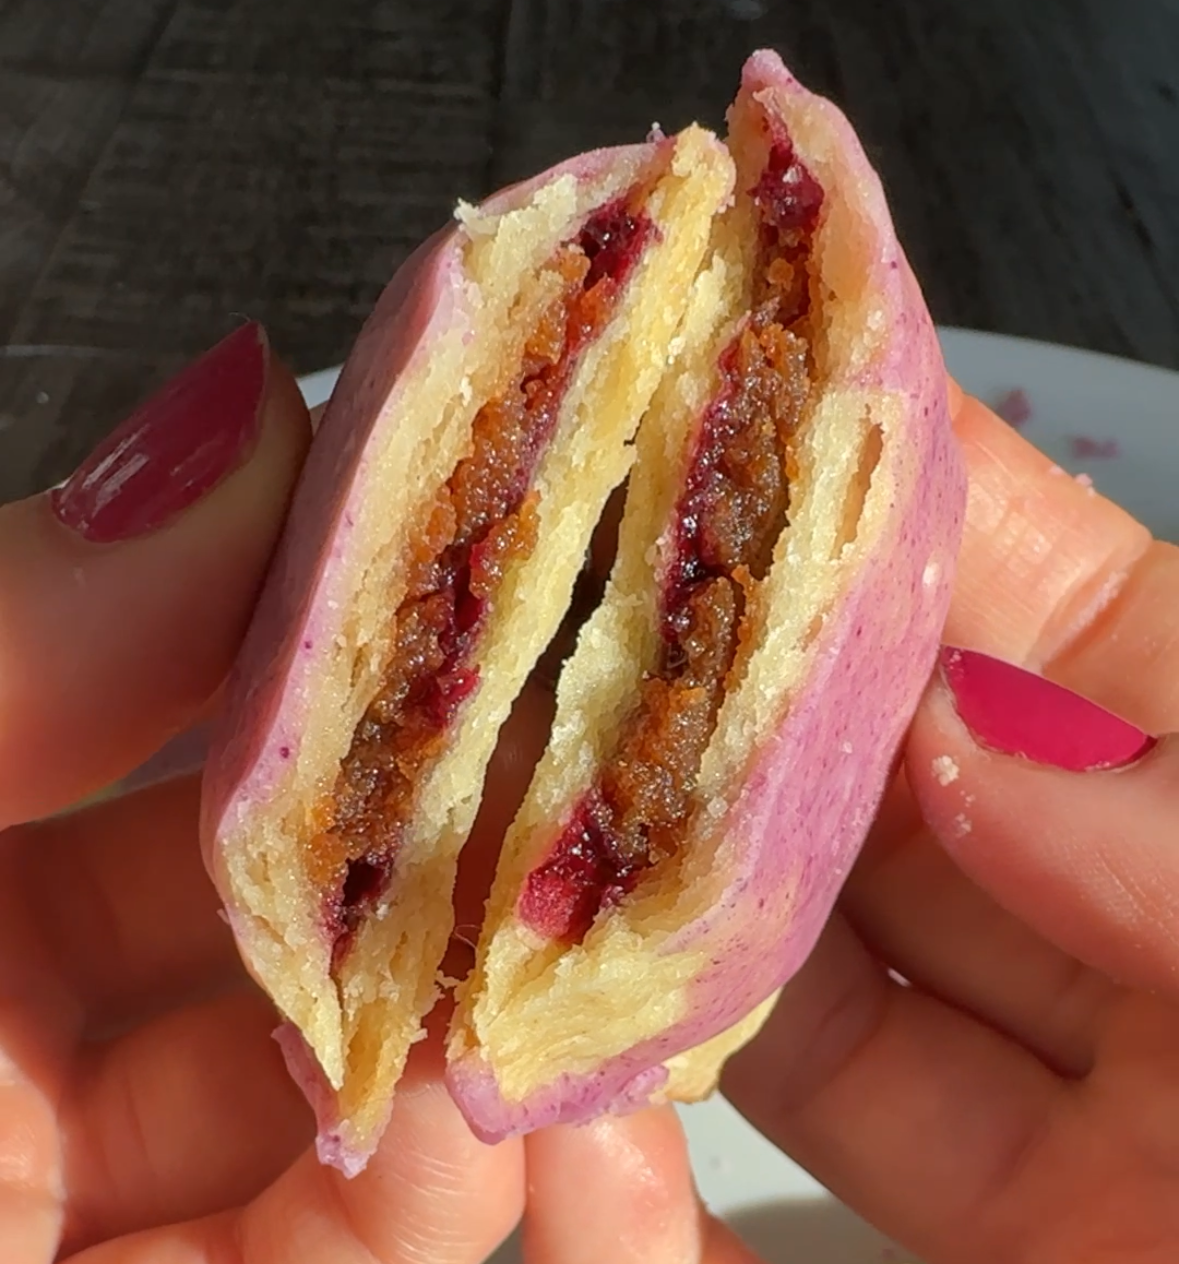
- Fill the tarts. On frozen tarts that have the outlines, or the tarts you want to use as your base, flatten about 1/2-1 tsp. of the peanut butter filling. Then, spread a thin layer of jam on top.
- Pull the other half of the Pop-Tarts out of the freezer and transfer from the parchment onto the tops of all the filled tarts. You want the dough to be frozen, so they are easy to pick up and transfer to the bottom layer of the tart. Wait about 5 minutes to let the dough come back to room temperature so they are pliable enough to seal. Using the end of a fork or your fingers, as I did, push the top of the dough down onto the bottom layer, making sure the dough seals and bonds together all the way.
- Preheat your oven to 300 degrees Fahrenheit. Use a skewer or toothpick to poke holes in the top of your Pop-Tarts, then place them back in the freezer.
- Once fully frozen about 20 minutes, bake your tarts until lightly golden brown on the bottom, about 30 minutes. Make sure to flip your tray halfway through baking to ensure even baking. I used two sheet trays for this, but the tarts don't spread very much, so if large enough, you can get away with one sheet tray.
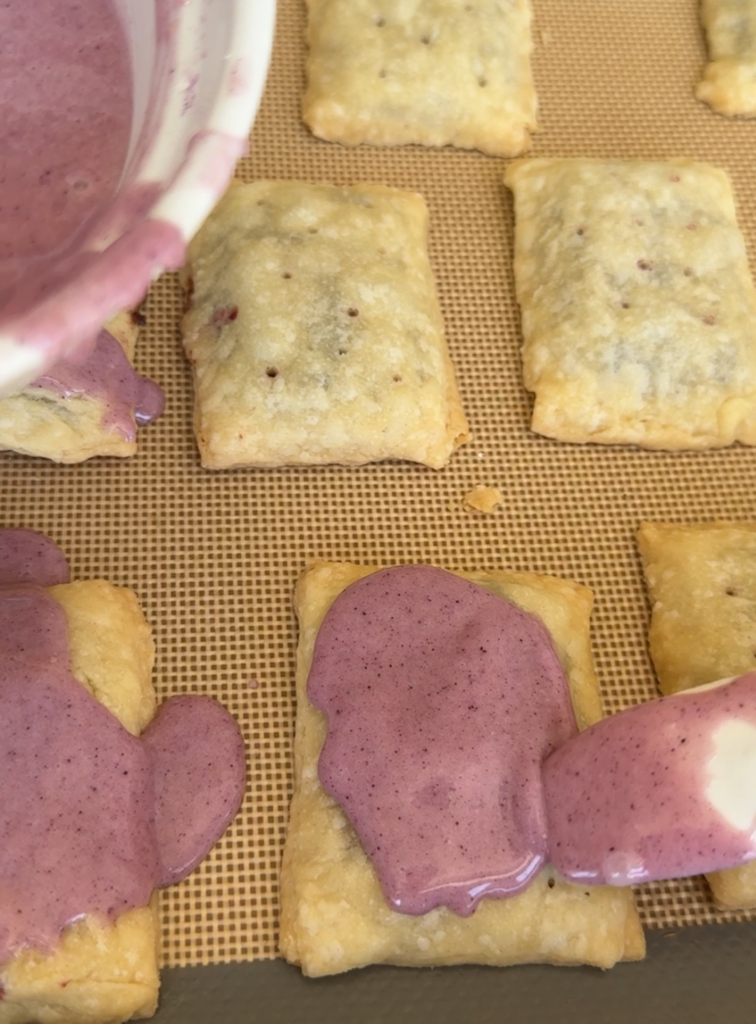
- Make the frosting. Start by browning your butter. In a small saucepan, heat your butter over medium heat until it starts to darken. Your butter will bubble, which is normal. Just keep stirring your butter in the pan. You want it to be a deep caramel color. Once the desired color is reached, take off the heat and pour into a bowl. Add the powdered sugar, salt, vanilla, and maple syrup. Stir to combine. Add plant milk as needed. You want the icing to be pretty thick, as you don't want it to run off the sides of the tarts, so use the milk sparingly. Add color if desired.
- Frost! Just have fun with pouring or spreading the icing on the cooled tarts. They don't need to look perfect and look best rustic! Add sprinkles if you'd like.